7/13/12

Commercials and Dinosaurs

Hi everyone. I've been pretty busy as of late directing various commercial projects and doing character animation for a few stop-motion shows. I'll bring you up to speed on the progress of The Hollow Boy in the next post but in the meantime I've included a commercial I directed with my Brother for the apparel company Hips and Hair. It was my first venture into live action so it was quite an adjustment to say the least. But fear not, the entire intro is animated along with a few other shots in this one and half minute epic. Hope you enjoy it as much as we had a fun making it.


And here's an episode from College Humor's "Dino Office" which I had the pleasure of animating on along with Ashley Arechiga and Pete Levin. Directed by Trisha Gum with puppets and sets by John Sumner and Emily Franz.


Until next time...

-Fonz

10/12/11

Puppet Fabrication (Built-Up Method) and Clothing for Stop-Motion Puppets - Part 5


So we've finally come to the end of the Puppet Fabrication (Built-Up Method) tutorial. The video above shows one of the final puppets in action. One final thing that still needs to be covered is how I created the head. 


To create the head I simply sculpted it out of Sculpey. Sculpey is a clay that won't harden until you throw it into the oven. It can also be used to fabricate set pieces, props, body parts and anything else you can imagine. The great thing about it is that it won't dry out between uses so you don't have to feel like you have to rush to finish a sculpt. Once you do put the final sculpt into oven it comes out rock hard and can be handled/sanded without ruining any of the details.


Here's a before and after picture of one of the heads I used. The photo on the left is the sculpt right out of the oven and the photo on the right is the same head with the final paint. For paint I used some extra cell paint that I had lying around, but acrylics will work just as well.


Here's a sample of some of the heads I'm using for the towns people. As I mentioned before these are supporting characters whose faces won't really be seen in the final film other than in cast their shadows and silhouettes, so sculpting eyes and mouths weren't necessary in this situation. These same techniques however can easily be expanded on to create a more detailed head that can actually be animated with the use of different mouth and eye shapes.

-Al-Gonzo

8/18/11

Puppet Fabrication (Built-Up Method) and Clothing for Stop-Motion Puppets - Part 4


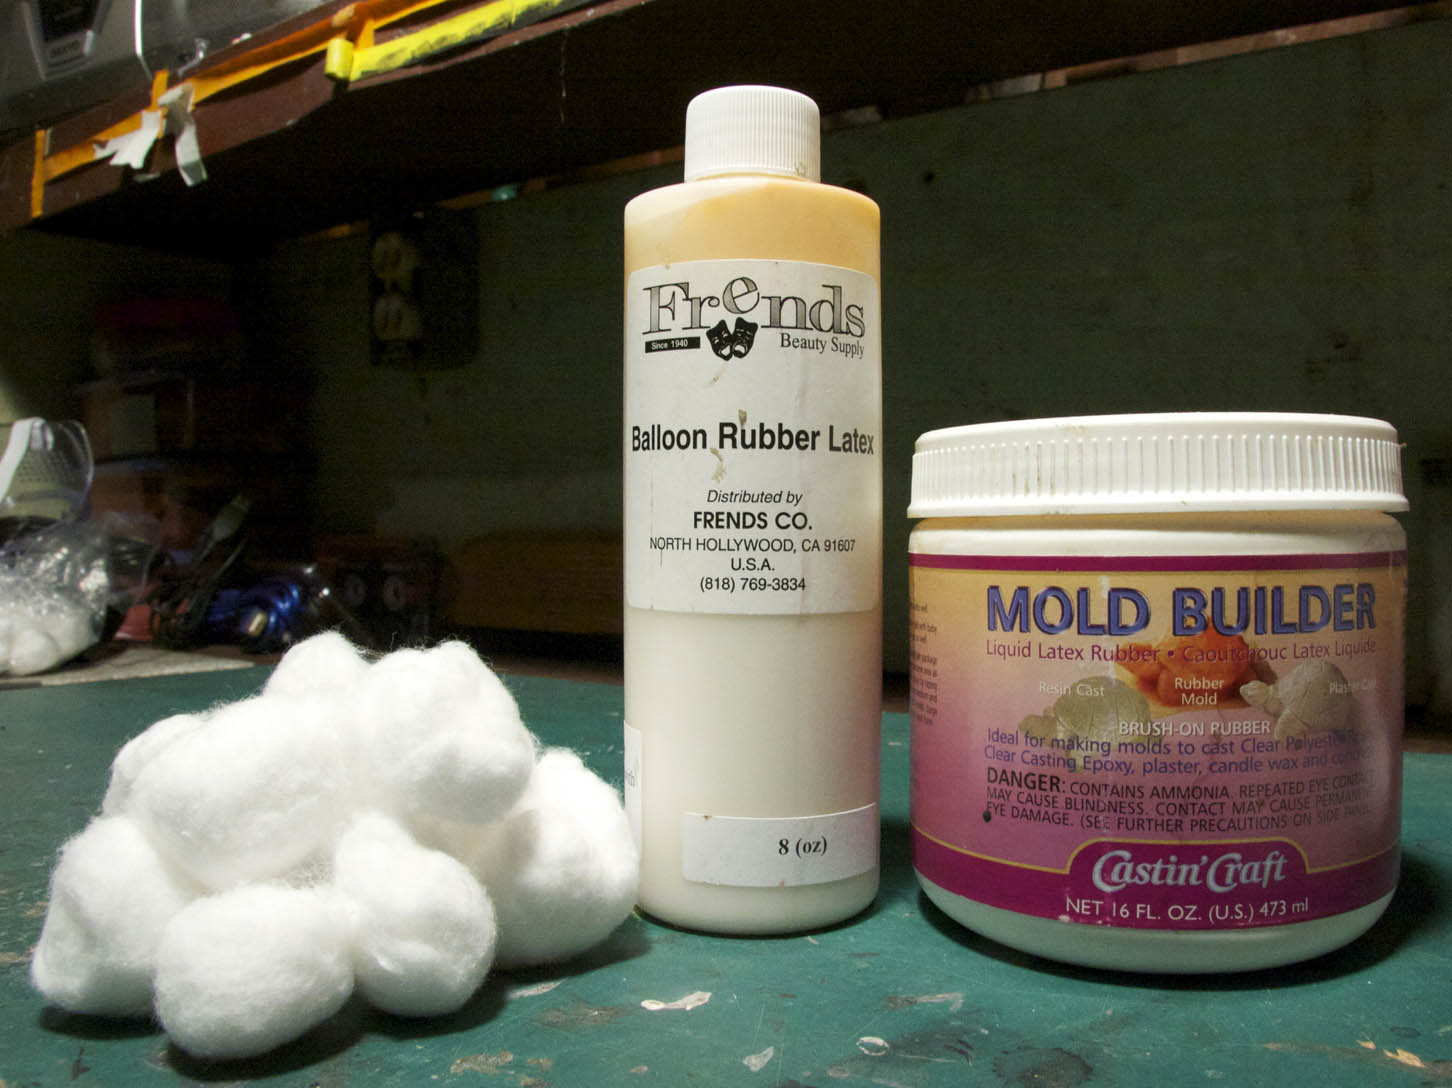
The next important element to address when fabricating these types of puppets are the hands and feet. Here is where the actual built-up method will be utilized. As I mentioned in one of the previous posts this method generally lends itself to being less expensive and time consuming than the foam latex process. One major drawback however is that once a puppet like this breaks, you'll have to re-fabricate the built-up portions all over again without the aid of a mold. This may or may not be a big deal depending on your specific situation. The materials you'll need will be: cotton balls and some form of liquid latex. I have used the "mold builder" latex (pictured above) in the past but have since moved on to "balloon rubber latex" because it handles and works the best. The mold builder will still work but will need to be thinned out with water and will require a lot of extra drying time. "Balloon rubber" latex can be found at Frends Beauty Supply and the "mold builder latex can be found at any Michael's Arts and Crafts.


Here we start off with our previously made armature.


Grab a cotton ball and tear off a lengthy sized strip like the one pictured above and apply the latex to it.


It should look something like this.


Next, take the latex saturated cotton and wrap it around one of the wires of the hand shaping it into a finger.


Dry it with a blow dryer. The "balloon rubber" latex will set in a few minutes while the "mold builder" would take much longer.


Repeat this process for each finger until you have something that hopefully resembles a hand.


You can smooth the fingers even further with a wood burning tool if need be.


Here's what the end result of that would look like.


Next, pour whatever latex your using into a small sized container that's big enough to dip the hand into. Dip the hand in allowing the latex to cover the entire surface. Let the excess latex drip off then blow dry. Repeat this process in layers until the hand is at a desirable thickness.


The finished product should look something like the photo above. Then all you have to do is paint it using PAX paints.


The same process can be used for the shoes, or slippers in this case.


As you can see here you really can create anything in layers with the built-up method.


Then just paint to your desired effect.

-Fonz